Introduction
Flooring plays a crucial role in enhancing the overall aesthetics and functionality of a home.
It sets the tone and style of the space while providing durability and comfort.
Choosing the right flooring is essential for creating a cozy and inviting atmosphere.
When it comes to flooring, many homeowners are opting for do-it-yourself (DIY) projects.
Installing your own flooring offers various benefits, both in terms of cost and personal satisfaction.
By taking on this task yourself, you have control over the entire process, from planning to installation.
Benefits of DIY flooring start with cost savings.
Hiring professionals can be expensive, but by doing it yourself, you can significantly reduce costs.
Additionally, DIY flooring allows you to select materials that fit your budget and preferences, ensuring that you get the best value for your money.
Another advantage of DIY flooring is the sense of accomplishment and pride that comes with completing a project on your own.
It gives you the opportunity to showcase your creativity and personal style, creating a unique space that reflects your individuality.
Furthermore, DIY projects offer flexibility and convenience.
You can work on the flooring at your own pace, without the need to schedule appointments or wait for contractors.
This allows you to fit the project into your own timeline and ensures that you are in control of every step.
In the following sections, we will explore the planning process, different types of DIY flooring options, step-by-step installation instructions, and important considerations.
By the end, you will have the knowledge and confidence to embark on your own DIY flooring project, transforming your home into a beautiful and personalized space.
Planning Your DIY Flooring Project
Assessing the area to be floored
First, measure the dimensions of the space accurately to determine the amount of flooring material required.
Examine the condition of the existing floor and identify any necessary repairs or preparations.
Consider the traffic and purpose of the room to choose a flooring material that suits your needs.
Choosing the right type of flooring
Research various types of flooring materials such as hardwood, laminate, vinyl, or tile.
Consider factors like durability, maintenance requirements, cost, and aesthetic appeal.
Evaluate the pros and cons of each type and select the one that aligns with your preferences and budget.
Calculating the material quantity
Use the measurements you obtained earlier to calculate the amount of flooring material needed.
Account for wastage and excess material, typically adding an extra 5-10% to your total calculation.
Consult with the flooring supplier or manufacturer to ensure accurate measurements and avoid shortages.
Setting a budget
Determine the maximum amount you are willing to spend on your DIY flooring project.
Consider the cost of the flooring material, underlayment, adhesive, and any necessary tools or equipment.
Factor in additional expenses like delivery fees, labor costs if outsourcing tasks, and unexpected contingencies.
Creating a timeline
Break down the project into smaller tasks and estimate the time needed for each.
Consider your availability and schedule, allowing for extra time for any unexpected delays or complications.
Set deadlines for completing each task to keep yourself accountable and ensure project completion.
Researching installation techniques
Explore different installation methods for the chosen type of flooring.
Consult manufacturer guidelines, online tutorials, or seek advice from professionals.
Understand the required tools, techniques, and potential challenges to prepare adequately.
Gathering the necessary tools and materials
Create a checklist of all the tools and materials needed for the installation.
Ensure you have everything on hand before starting the project to avoid unnecessary interruptions.
Quality tools like a utility knife, tape measure, underlayment, adhesive, and safety equipment are essential.
Preparing the floor
Clean the existing floor thoroughly, removing any dirt, dust, or debris.
If necessary, apply a primer or level the surface to ensure a smooth and even base.
Allow the floor to dry completely before proceeding with the installation process.
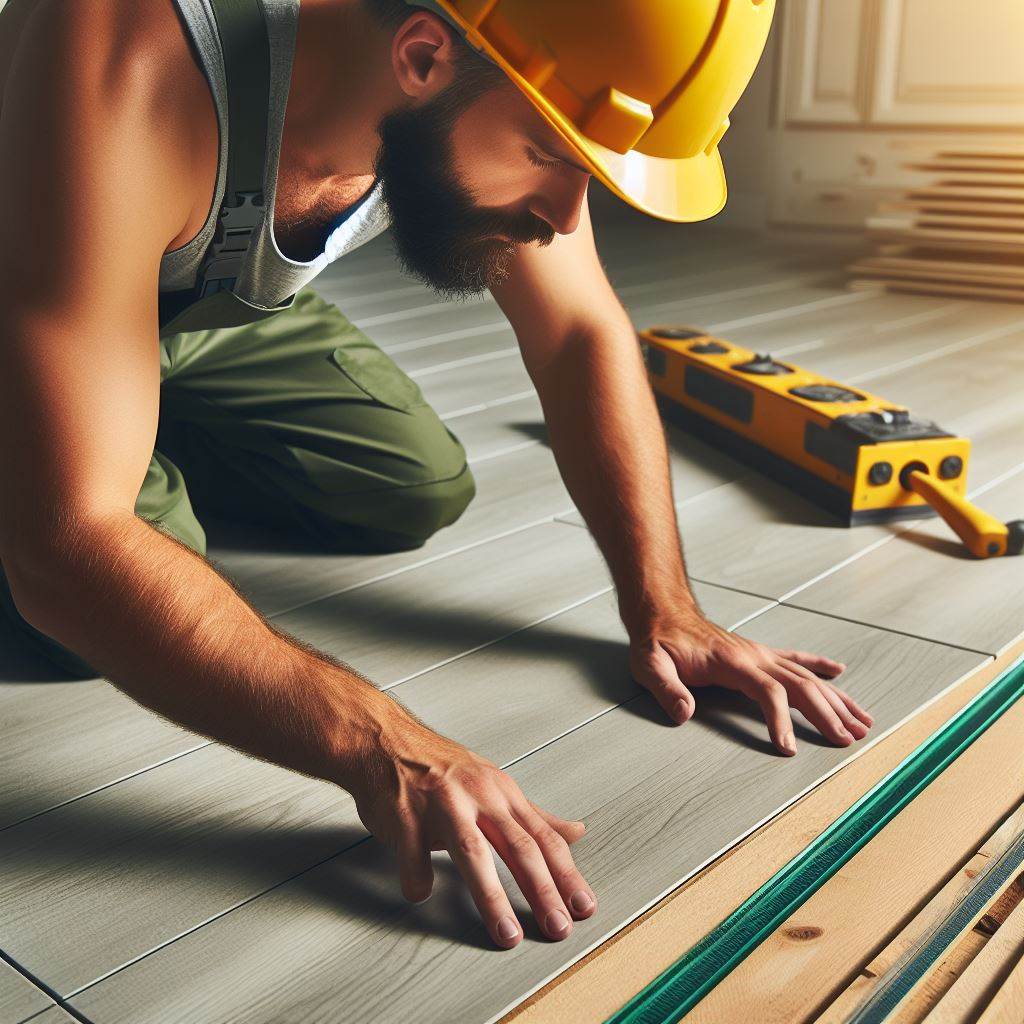
Installing the flooring
Follow the manufacturer’s instructions carefully to ensure a correct and secure installation.
Lay out the flooring material, starting from one corner and working towards the opposite wall.
Use adhesive or interlocking mechanisms based on the type of flooring chosen.
Trim any excess material and ensure proper alignment and spacing between the planks or tiles.
Completing the finishing touches
Clean the installed flooring to remove any residue or adhesive marks.
Install baseboards or trim to give a polished look and hide any gaps or imperfections.
Inspect the entire installation for any loose boards or tiles and make necessary adjustments.
Maintaining your new floor
Learn the recommended cleaning and maintenance practices for your specific flooring material.
Follow routine cleaning procedures and address any spills or stains promptly.
Protect the floor from heavy furniture or high-traffic areas to prolong its longevity.
In essence, planning your DIY flooring project is crucial for a successful and cost-effective outcome.
Assessing the area, choosing the right type of flooring, calculating materials, setting a budget, and creating a timeline are essential steps to consider.
Additionally, researching installation techniques, gathering necessary tools, preparing the floor, and following proper installation methods ensure a professional and long-lasting result.
Don’t forget the finishing touches and maintenance required to keep your new flooring looking its best for years to come.
Read: DIY Painting Techniques for Stunning Walls
Gather the Necessary Tools and Materials
When it comes to DIY flooring, having the right tools and materials is crucial for a successful installation.
Before diving into the project, it’s important to gather everything you need. Here is a list of essential tools for DIY flooring:
Essential tools for DIY flooring
- Tape measure – For accurate measurements of the floor area.
- Pencil – To mark reference lines and make notes on the flooring.
- Utility knife – Used for cutting materials such as carpet, vinyl, or laminate.
- Chalk line – Helps create straight guideline for precise installation.
- Knee pads – Provides comfort and protection when working on the floor.
- Claw hammer – For removing old flooring or fixing loose boards.
- Undercut saw – Used to trim door jambs and casings.
- Jigsaw – Ideal for cutting irregular shapes or curves in the flooring.
- Tile cutter – Essential tool for cutting tiles to fit in the desired pattern.
- Notched trowel – Used to spread adhesive evenly on the floor surface.
- Spacers – Ensure consistent gaps between flooring materials for expansion.
- Tapping block – Helps secure laminate or hardwood during installation.
- Pry bar – Useful for removing baseboards or existing flooring.
- Level – Ensures the floor surface is even and properly aligned.
- Drill – Necessary for making holes or securing subflooring.
- Sanding block – Used to smooth out imperfections in the subfloor.
- Vice grips – Assist in gripping and pulling stubborn materials.
- Staple gun – For securing underlayment or carpet padding.
- Work gloves – Protects hands during handling of materials and tools.
- Safety glasses – Essential for eye protection against potential hazards.
Researching and selecting the appropriate materials
Researching and selecting the appropriate materials is another important aspect of DIY flooring.
Each type of flooring material has its own advantages and considerations.
Here are some factors to consider when selecting materials:
- Style and design – Choose a flooring material that suits your personal taste and complements the room’s aesthetic.
- Durability – Consider the wear and tear the flooring will experience in the intended space.
- Maintenance requirements – Some materials require more upkeep than others.
- Moisture resistance – Evaluate if the flooring material is suitable for areas prone to moisture.
- Installation method – Different flooring materials require specific installation techniques.
- Budget – Determine the cost of the material, including additional accessories or underlayment.
Getting all the supplies and ensuring their quality
Once the tools and materials are identified, it’s time to gather all the supplies and ensure their quality.
Consider the following steps:
- Make a comprehensive list of all the required materials and quantities needed.
- Check the inventory of tools and ensure they are in good working condition.
- Visit local hardware or flooring stores to purchase the necessary supplies.
- Inspect the quality of the materials, ensuring they are free from defects or damages.
- Compare prices and explore different options to make informed purchasing decisions.
- If ordering online, read customer reviews and verify the authenticity of the supplier.
- Double-check the items upon delivery to ensure everything is accurately provided.
- Store the materials in a safe and dry location until the installation process begins.
Gathering the necessary tools and materials is a crucial step in the DIY flooring process.
It sets the foundation for a successful installation and ensures a smooth workflow.
With the appropriate tools and high-quality materials, you’re on your way to achieving a beautiful and functional floor.
Read: Budgeting for a Basement Overhaul

Preparing the Subfloor
Before installing DIY flooring, it is crucial to properly prepare the subfloor. Here’s how:
Inspecting the Subfloor Condition
The first step in preparing the subfloor is to thoroughly inspect its condition.
Look for any visible damage or signs of unevenness such as cracks, holes, or warping.
If you notice any of these issues, it is essential to address them before proceeding with the flooring installation.
Ignoring them can lead to problems and affect the overall quality of the finished floor.
Repairing Any Damages or Unevenness
Once you have identified any damages or uneven areas, it’s time to repair them.
Patch up any cracks or holes using a suitable filler or compound.
If the subfloor is significantly uneven, you may need to level it using a self-leveling compound.
This will ensure a smooth and even surface for the flooring installation.
Cleaning and Leveling the Subfloor
Next, thoroughly clean the subfloor to remove any dirt, dust, or debris.
Sweep or vacuum the surface, ensuring it is completely free from any particles that could interfere with the flooring installation.
After cleaning, double-check for any remaining unevenness.
If necessary, sand down any high spots and fill in any low areas to create a level surface.
Applying Moisture Barriers, If Required
Depending on the type of flooring you are installing and the environment, you may need to apply moisture barriers to the subfloor.
Moisture barriers are essential in areas prone to moisture, such as basements or bathrooms.
They prevent moisture from seeping into the flooring and causing damage over time.
There are different types of moisture barriers available, such as plastic sheets or liquid-based solutions.
Follow the manufacturer’s instructions to apply them correctly.
Remember to allow sufficient drying time for the moisture barriers before moving on to the next step of the flooring installation.
By properly preparing the subfloor, you are setting the foundation for a successful DIY flooring project.
Taking the time to inspect, repair, clean, level, and apply moisture barriers, if necessary, will ensure a smooth and durable finished floor.
Skipping or rushing through these crucial steps can result in an uneven or damaged floor, leading to costly repairs or early replacement.
So, invest the time and effort beforehand to enjoy a beautiful and long-lasting DIY floor in your home.
Read: Step-by-Step Guide to DIY Bathroom Makeover
Installing Different Types of Flooring
When it comes to DIY flooring, there are various options to choose from.
Whether you prefer the classic appeal of hardwood, the affordable versatility of laminate, the waterproof features of vinyl, or the durability of tile, each type requires a specific installation process.
Step-by-step guide for installing hardwood flooring
Prepare the subfloor by cleaning, leveling, and removing any existing flooring or carpet.
Measure the room and calculate the required amount of hardwood flooring, accounting for wastage.
Acclimate the hardwood planks in the room for at least 48 hours before installation.
Start installing the vapor barrier or underlayment to protect against moisture.
Begin laying the hardwood planks in one corner of the room, using a nail gun or adhesive.
Ensure the planks are properly aligned and leave expansion gaps around the perimeter of the room.
Continue installing the remaining planks, staggering the joints for a more natural appearance.
Trim the last row of planks to fit, leaving a gap for expansion against walls.
Add baseboards or shoe molding to cover the expansion gaps and provide a finished look.
Finally, clean the hardwood flooring thoroughly and enjoy your new elegant and timeless floors.
Step-by-step guide for installing laminate flooring
Clean and level the subfloor, removing any obstacles and repairing any damages.
Measure the room and calculate the needed amount of laminate flooring, considering wastage.
Acclimate the laminate boards in the room for 48 hours before installation.
Install a vapor barrier or underlayment to protect against moisture and cushion the flooring.
Begin laying the laminate planks in a corner, following the manufacturer’s recommended installation method.
Ensure each plank is properly connected using the click-lock mechanism or adhesive.
Continue installing the planks row by row, staggering the joints for stability and aesthetics.
Trim the last row of planks to fit, leaving a small gap for expansion against walls.
Install baseboards or quarter round to cover the gaps and provide a polished look.
Finally, clean the laminate flooring and admire your beautiful, low-maintenance floors.
Step-by-step guide for installing vinyl flooring
Prepare the subfloor by cleaning, leveling, and removing any old flooring or carpet.
Measure the room and calculate the necessary amount of vinyl flooring, considering wastage.
Acclimate the vinyl planks or sheets in the room for 24-48 hours.
Ensure the subfloor is smooth and install a suitable underlayment if required.
If using vinyl planks, start laying them from a corner, using adhesive or the click-lock system.
For vinyl sheets, roll them out carefully, allowing for some excess against walls.
Trim the vinyl to fit properly and use heat to fuse the seams together for better stability.
Install baseboards or vinyl molding to cover the edges and create a finished look.
Thoroughly clean the vinyl flooring and take pleasure in its water-resistant and easy-to-maintain nature.
Step-by-step guide for installing tile flooring
Prep the subfloor by removing any old flooring, cleaning, and making it level.
Measure the room and calculate the required amount of tiles, accounting for waste and pattern considerations.
Acclimate the tiles in the room for at least 24 hours.
Spread thin-set mortar over a small area of the subfloor, using a notched trowel.
Begin laying the tiles in the mortar, pressing them evenly and leaving gaps for grout.
Continue laying tiles and periodically check for levelness and proper alignment.
Once all tiles are laid, allow the mortar to dry completely before grouting.
Apply the grout, making sure to fill all the gaps and wiping away excess with a damp sponge.
After the grout has cured, seal it to prevent staining and protect the tile.
Step back and admire your newly installed tile flooring, known for its durability and timeless beauty.
By following these step-by-step guides, you can confidently install different types of flooring and transform your space into a stunning and functional environment.
Read: Nailing Your Renovation Budget Plan
Dealing with Challenges and Tips for Success
When it comes to DIY flooring installation, there are several common challenges that many people face.
However, with the right tips and strategies, you can overcome these challenges and achieve a successful result.
Here are some tips to help you tackle common flooring installation issues and ensure a professional finish.
Common challenges faced during flooring installation
- Inaccurate measurements: Measure twice, cut once to avoid wasting materials and ensure a precise fit.
- Uneven subfloor: Use self-leveling compound or plywood to create a smooth and level surface.
- Subfloor moisture: Test the moisture levels and address any issues to prevent damage to the new flooring.
- Removing old flooring: Properly prepare the subfloor by removing any existing flooring and adhesive residue.
Troubleshooting tips for different flooring types
- Laminate flooring: Avoid installing laminate in high-moisture areas and use an underlayment for soundproofing.
- Hardwood flooring: Acclimate the wood to the room’s humidity before installation to prevent warping or gaps.
- Tile flooring: Ensure a solid foundation by using a cement backer board and plan the layout carefully.
- Vinyl flooring: Allow the vinyl to relax in the room for at least 24 hours before installation to prevent shrinkage.
Maintaining proper measurements and alignments
- Use a chalk line or laser level to ensure straight and accurate guidelines for positioning the flooring.
- Double-check the measurements before cutting to avoid costly mistakes and uneven installations.
- Take note of any obstacles such as doorways, vents, or cabinets and plan accordingly for a seamless fit.
- Trim excess material and ensure tight joints for a professional and polished appearance.
Ensuring a smooth and professional finish
- Start in a corner and work your way out to ensure a consistent pattern and avoid trapped corners.
- Use spacers to maintain proper expansion gaps, especially for floating floor installations.
- Secure the flooring properly using the recommended fasteners or adhesives for a sturdy and long-lasting result.
- Clean up any excess adhesive or grout immediately to avoid stains and marks on the finished flooring.
By being aware of these challenges and following these tips, you can achieve a successful flooring installation.
Remember to plan thoroughly, take accurate measurements, and have the necessary tools and materials ready before starting the project.
With patience and attention to detail, you can enjoy a beautiful and functional new floor that you can proudly say you installed yourself!
Conclusion
DIY flooring projects can be a rewarding and satisfying experience.
Recapping the DIY flooring process, it starts with planning and measuring the area.
Next, selecting the type of flooring, such as hardwood, laminate, or tile, and purchasing the necessary materials.
The installation process involves preparing the subfloor, laying down the underlayment, and then installing the flooring.
It is important to follow the manufacturer’s instructions and take the necessary precautions throughout the process.
By completing a DIY flooring project, you can save money and have the satisfaction of accomplishing it on your own.
Readers are encouraged to try DIY flooring projects to enhance their homes and gain new skills.
The satisfaction of seeing the finished result, walking on the new flooring, and knowing you did it yourself is unmatched.
So why not take on a DIY flooring project and experience the joy of transforming your space with your own hands?
Start planning, gather the materials, and enjoy the process of creating a beautiful and functional space.
Remember, with careful planning and attention to detail, you can achieve professional-looking results and be proud of your accomplishment.