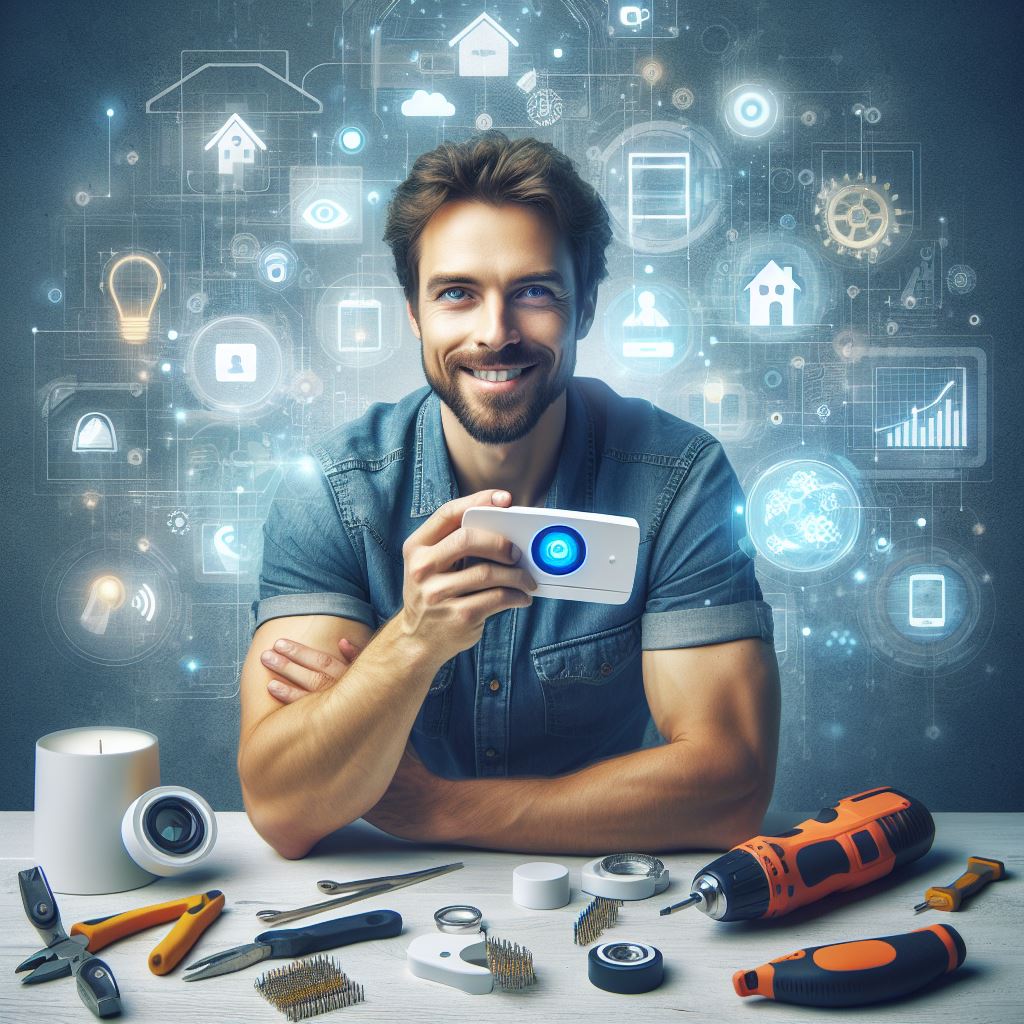
Introduction
The trend of DIY home tech installations is rapidly growing, with homeowners taking on projects themselves.
More and more people are opting to install their own home technology systems to save money and have control over the process.
By embracing DIY home tech installations, homeowners can customize their setups to meet their specific needs and preferences.
Furthermore, innovative DIY installations enable homeowners to incorporate new and cutting-edge technologies into their homes.
Installing smart devices and automated systems can greatly enhance the functionality and convenience of a home.
For example, homeowners can integrate voice-controlled assistants, security cameras, and smart thermostats into their homes.
These innovative DIY installations allow for increased energy efficiency, improved home security, and seamless control of various home functions.
With the advancements in technology, installing and configuring these systems has become more accessible and user-friendly.
Many manufacturers provide detailed instructions and online resources to support DIY enthusiasts in their installation endeavors.
Moreover, there is a vast community of DIY tech enthusiasts who share their experiences, ideas, and troubleshooting tips online.
In fact, the trend of DIY home tech installations offers homeowners the opportunity to enhance their homes’ functionality and convenience.
By embracing innovation and utilizing DIY techniques, homeowners can create personalized and efficient living spaces.
Smart Home Security Systems
In today’s rapidly evolving technological landscape, securing your home has become smarter and more accessible than ever.
Smart home security systems offer a cutting-edge solution to safeguard your loved ones and property.
The best part? You can easily install these systems yourself, saving both time and money.
In this section, we’ll delve into the world of DIY installation for smart security systems, exploring the advantages and providing you with a step-by-step guide.
DIY Installation Options
Installing a smart home security system might seem like a daunting task, but with the right guidance, it becomes surprisingly simple.
DIY enthusiasts can choose from a variety of systems, ranging from basic cameras and sensors to comprehensive setups that include doorbell cameras, motion detectors, and smart locks.
Manufacturers often provide user-friendly apps that streamline the installation process, making it accessible for users of all technical backgrounds.
Advantages of Owning and Installing a Smart Security System
The benefits of having a smart security system extend far beyond peace of mind.
DIY installations empower homeowners with the ability to customize their security network according to their specific needs.
Remote access to live feeds, instant alerts, and integration with other smart devices contribute to a seamless and holistic security experience.
Additionally, the mere presence of visible security devices acts as a deterrent, enhancing the overall safety of your home.
Step-by-Step Guide for Setting Up a Smart Security System
- Plan Your System: Identify key areas for surveillance and determine the type and number of devices needed.
- Choose the Right Devices: Select cameras, sensors, and locks compatible with your chosen smart home ecosystem.
- Install the Hardware: Follow manufacturer instructions to mount cameras, place sensors, and install smart locks at entry points.
- Connect to the App: Download and set up the accompanying app, connecting each device to your home network.
- Configure Settings: Customize alert preferences, camera angles, and automation rules within the app for a tailored security experience.
- Test Your System: Verify that all components are functioning correctly and conduct test scenarios to ensure optimal performance.
By taking the DIY approach to smart home security systems, you not only save on installation costs but also gain a deeper understanding of your home’s security infrastructure.
With a little effort, you’ll be well on your way to enjoying the peace of mind that comes with a smartly secured home.
Read: Revamp Your Living Room: DIY Style Guide
Voice-Activated Assistants
In today’s era of technology, voice-activated assistants have become increasingly popular and can be found in many households.
These smart devices, powered by artificial intelligence, have revolutionized the way we interact with technology in our homes.
In this section, we will delve into the overview of popular voice-activated assistants in the market, the DIY installation process, the benefits they bring to your home, and some tips and tricks for maximizing their use.
Overview of Popular Voice-Activated Assistants
When it comes to voice-activated assistants, there are a few dominant players in the market.
Amazon Echo, powered by Alexa, and Google Home, powered by Google Assistant, are two of the most famous options available.
These devices, equipped with microphones and speakers, enable users to control various smart home devices and perform tasks through voice commands.
DIY Installation Process for Voice-Activated Assistants
Installing a voice-activated assistant in your home is a simple and straightforward process.
Start by unboxing the device and plugging it into a power source.
Next, download the respective app onto your smartphone and follow the on-screen instructions to connect the assistant to your Wi-Fi network.
Once connected, you can customize the settings and preferences according to your needs.
Benefits of Having a Voice-Activated Assistant in Your Home
The presence of a voice-activated assistant in your home brings forth numerous advantages.
Firstly, it adds convenience to your daily life.
You can control various smart devices, such as lights, thermostats, and security systems, with simple voice commands.
Moreover, these assistants can provide you with real-time information, weather updates, and even play music on demand.
Secondly, voice-activated assistants can act as personal assistants, helping you manage your schedules, set reminders, and make appointments.
You can ask them to read out your calendar, send messages, and even order groceries online.
They can also provide you with hands-free calling, enabling you to make and receive phone calls without lifting a finger.
Thirdly, these smart devices are constantly evolving and improving their capabilities.
With regular software updates, they learn and adapt to your preferences, ensuring a personalized experience.
They can also be integrated with other smart home devices, creating a seamless ecosystem where you can control everything through your voice.
Tips and Tricks for Maximizing the Use of Voice-Activated Assistants
To make the most out of your voice-activated assistant, consider the following tips and tricks:
- Clearly articulate your commands to ensure accurate interpretation.
- Use the assistant to streamline your routines and automate tasks.
- Explore the skills and capabilities of your assistant by trying different voice commands.
- Create personalized routines to trigger multiple actions with a single command.
- Protect your privacy by muting the microphone when not in use and reviewing voice recordings.
Remember, the more you interact with your voice-activated assistant, the more it learns and adapts to your needs, enhancing your overall experience.
In essence, voice-activated assistants have become indispensable in modern homes.
With their easy installation process, countless benefits, and endless possibilities, these devices are here to stay.
Whether you want to control your smart home devices, manage your schedules, or simply enjoy hands-free convenience, a voice-activated assistant will undoubtedly enhance your daily life.
Read: Small Space, Big Impact: DIY Storage Solutions
Home Automation and Control Systems
DIY installation options for home automation systems
Installing a home automation system yourself provides flexibility in choosing components and reduces costs.
Many companies offer DIY home automation kits that include easy-to-follow installation instructions.
Homeowners can choose between wireless or wired systems based on their preferences and home structure.
DIY installation options allow homeowners to customize their home automation systems according to their needs.
Advantages of using home automation and control systems
Home automation systems offer convenience by allowing control of various devices from a central hub.
Energy efficiency is improved with the ability to schedule and automate lighting and thermostat settings.
Remote access to systems enables homeowners to monitor and control their homes from anywhere using smartphones.
Enhanced security features like surveillance cameras and smart locks provide peace of mind for homeowners.
Step-by-step guide for setting up a home automation system on your own
- Start by planning the areas and devices you want to automate in your home.
- Choose a home automation hub that suits your needs and is compatible with different devices.
- Install and configure the hub according to the manufacturer’s instructions.
- Identify the devices in your home that are compatible with the chosen home automation system.
- Connect the devices to the hub via wireless or wired connections as required.
- Configure the automation rules and schedules for each device or group of devices.
- Test the automation system and make necessary adjustments to ensure proper functionality.
- Download and set up the mobile app for remote access and control of your home automation system.
- Enjoy the convenience and benefits of your DIY-installed home automation system.
Examples of innovative home automation features to consider
Voice control integration allows homeowners to control devices through voice commands using voice assistants.
Smart thermostats with learning capabilities adapt to homeowners’ preferences and optimize energy efficiency.
Automated blinds and curtains can be programmed to open and close based on time, temperature, or sunlight levels.
Water leak detection systems can send alerts to homeowners’ smartphones, preventing potential water damage.
Home automation and control systems bring convenience, energy efficiency, and security to modern homes.
With the availability of DIY installation options, homeowners can easily set up their customized automation systems.
By following a step-by-step guide and exploring innovative features, transforming your home into a smart home is within reach.
Investing in a home automation system is a wise decision that enhances both comfort and functionality in everyday life.
Read: Master Bedroom Makeover: DIY Essentials
Energy-Efficient Smart Thermostats
Smart thermostats offer a remarkable solution for homeowners seeking energy efficiency and increased convenience.
With their DIY installation capabilities, anyone can enjoy the benefits these devices bring without the need for professional help.
Here, we will explore the possibilities of installing smart thermostats, the advantages they provide, and a step-by-step guide on how to install them on your own:
DIY Installation Possibilities for Smart Thermostats
- Smart thermostats come with user-friendly interfaces, making them easy to install without professional assistance.
- Most smart thermostats are designed for compatibility with existing heating, ventilation, and air conditioning (HVAC) systems.
- Installation typically involves shutting off the power, removing the old thermostat, attaching the new mounting plate, and connecting the wires.
- Once the wires are properly connected, the smart thermostat can be mounted onto the wall and turned on.
Benefits of Energy-Efficient Smart Thermostats
- Energy-saving capabilities are perhaps the most significant advantage of smart thermostats.
- Smart thermostats adapt to your schedule, ensuring optimal comfort and energy efficiency throughout the day.
- Remote access allows you to control the thermostat from anywhere using smartphone apps or voice assistants.
- Some smart thermostats provide detailed energy usage reports, helping you monitor and analyze your consumption.
Step-by-Step Guide for DIY Installation
- Start by turning off the power to your HVAC system at the circuit breaker or main electrical panel.
- Remove the old thermostat cover and disconnect the wires attached to it.
- Secure the mounting plate provided with your smart thermostat onto the wall.
- Connect the wires from your HVAC system to the corresponding terminals on the smart thermostat’s base plate.
- Attach the smart thermostat’s base plate to the mounting plate and ensure it is securely in place.
- Install the batteries if required and attach the thermostat faceplate to the base.
- Turn on the power to your HVAC system and follow the on-screen instructions to complete the setup process.
Tips for Optimizing Energy Savings
- Set a schedule that aligns with your daily routine to avoid unnecessary energy consumption.
- Utilize the thermostat’s advanced features such as geofencing and learning algorithms to maximize energy efficiency.
- Be mindful of temperature settings, keeping them at reasonable levels while maintaining comfort.
- Regularly monitor and adjust your energy-saving settings based on seasonal variations and personal preferences.
By installing energy-efficient smart thermostats in your home, you can enjoy the comfort they provide while reducing your environmental impact and saving on energy bills.
With the simple steps outlined above, anyone can embrace this innovative DIY home tech installation and take control of their energy usage.
Read: Create Your Dream Home Office: DIY Tips
Entertainment Systems and DIY Home Theaters
Overview of DIY installation options for entertainment systems
When it comes to setting up an entertainment system at home, there are numerous DIY installation options available.
One popular option is to use wireless speakers, which eliminate the need for cumbersome wires and allow for more flexibility in speaker placement.
Another option is to invest in a soundbar, which is a long, slim speaker that can be placed beneath a television or mounted on the wall.
For those who want a more immersive audio experience, a DIY home theater system might be the way to go. This involves setting up multiple speakers around a room to create a surround sound effect.
Benefits of setting up a DIY home theater
There are several benefits to setting up a DIY home theater.
First and foremost, it allows you to have a high-quality audio and visual experience right in the comfort of your own home.
You have full control over the equipment and can choose components that meet your specific needs and budget.
Additionally, setting up a DIY home theater can be a fun and rewarding project. It gives you the opportunity to customize your entertainment space and showcase your technical skills.
Step-by-step guide for creating a DIY home theater
Creating a DIY home theater requires careful planning and execution. Here is a step-by-step guide to help you get started:
- Choose the room: Select a room in your home that will serve as the dedicated space for your home theater. Consider factors such as size, lighting, and accessibility.
- Plan the layout: Determine the optimal seating arrangement and speaker placement for the room. Consider the viewing angles and acoustics.
- Install wiring: If you are opting for a surround sound system, you will need to run speaker wires from the AV receiver to the designated speaker locations.
- Set up the audio system: Connect the speakers, subwoofer, and AV receiver according to the manufacturer’s instructions. Calibrate the system for optimal sound quality.
- Choose the display: Select a high-definition television or projector screen that fits within your budget and suits the size of the room.
- Position the display: Mount the television on the wall or place it on a sturdy stand. Ensure that it is at eye level and centered within the viewing area.
- Set up the video system: Connect your DVD player, streaming device, or gaming console to the television. Configure the settings for optimal video quality.
- Furnish the space: Select comfortable seating options and add blackout curtains or blinds to create a theater-like atmosphere.
- Fine-tune the system: Adjust the audio and video settings to your personal preferences. Experiment with different speaker configurations and seating positions to optimize the viewing experience.
Recommendations on affordable and quality equipment for DIY home theaters
When it comes to purchasing equipment for your DIY home theater, there are many affordable and quality options available.
Some recommended brands for audio equipment include Yamaha, Klipsch, and Polk Audio. These brands offer a range of speakers and subwoofers to suit different budgets.
For video equipment, brands like Sony, LG, and Samsung provide high-quality televisions and projectors at various price points.
It is also worth considering online marketplaces and second-hand stores for deals on used equipment.
Ultimately, the key is to research and compare different options to find the best combination of affordability and quality for your DIY home theater.
Miscellaneous DIY Home Tech Installations
Innovative DIY home tech installations
Embracing innovation at home has never been more accessible, thanks to the plethora of do-it-yourself (DIY) home tech installations available today.
While smart lighting, locks, and home monitoring systems often take center stage, there’s a fascinating world of miscellaneous DIY tech projects waiting to elevate your living space.
Examples of DIY projects such as smart lighting, smart locks, and home monitoring systems
In the realm of lighting, DIY enthusiasts are pushing boundaries beyond conventional smart bulbs.
Ambitious projects like custom LED strip installations that sync with music or change colors based on room temperature have gained popularity.
These ventures not only showcase creativity but also provide a personalized ambiance that commercial products may lack.
Smart locks have become a staple in modern home security, but DIY enthusiasts are taking it a step further.
Crafting custom access control systems using RFID technology or integrating facial recognition with existing locks allows for a unique and secure entry experience.
The satisfaction of knowing you designed your home’s security system is unparalleled.
Home monitoring systems, a staple in smart homes, have evolved into intricate DIY projects.
Enthusiasts are combining Raspberry Pi setups with motion sensors and cameras to create affordable and customizable surveillance solutions.
The ability to monitor your home remotely, coupled with the satisfaction of building it yourself, adds a sense of accomplishment.
While the benefits of DIY tech installations are evident, challenges do exist.
The learning curve associated with advanced projects can be steep, requiring a commitment to research and experimentation.
Troubleshooting issues may become a part of the journey, but the knowledge gained is invaluable.
Advantages and challenges of tackling advanced DIY home tech installations
The versatility of miscellaneous DIY home tech installations allows homeowners to tailor their living spaces to meet unique needs and preferences.
From personalized lighting to cutting-edge security systems, the possibilities are as vast as one’s imagination.
As technology continues to advance, so too will the realm of DIY home tech installations, offering homeowners the opportunity to redefine their living spaces with innovation and ingenuity.
Conclusion
DIY home tech installations offer numerous benefits and are of crucial importance.
They allow homeowners to save money and customize their living spaces according to their preferences.
By exploring innovative DIY projects, individuals can enhance the functionality and comfort of their homes.
Additionally, the future of DIY home tech installations seems promising as advancements in technology continue to evolve.
In summary, the importance and benefits of DIY home tech installations cannot be overstated.
From cost savings to personalized customization, these projects empower homeowners to take control of their living environments.
It is encouraging to see individuals embrace innovative DIY projects, and there is no shortage of opportunities to explore.
Whether it is a smart doorbell, home security system, or energy-efficient solutions, there are countless options available for homeowners to experiment with.
Looking ahead, the future of DIY home tech installations holds great potential.
Rapid advancements in technology pave the way for even more innovative and accessible solutions.
As technology becomes more user-friendly, homeowners will be able to implement complex systems with relative ease. The possibilities are endless, and the only limit is one’s imagination.
By embracing DIY home tech installations, individuals are not only improving their homes but also contributing to the exciting future of smart living.
So, don’t hesitate to embark on your DIY journey and discover the endless possibilities that await in transforming your home into a tech-savvy oasis.